As we’ve been working with different artists, we keep running into the headaches of keeping all their bio links updated. Since at vyb we have your email signup, music, merch, and everything else, we decided to make a free Link-in-Bio Tool that you can easily use. Like our free email list sign-up landing pages, we are making life easier to stay connected with yoru fans and give them an easy way to access everything you have.
Our tool will automatically populate based on your content on vyb. For example, as soon as you make your first merch item, the merch store button will automatically populate. Have any upcoming events? The event link button will auto-populate. No more having old, stale links.
The service is 100% free. Because we win when you win.
Here are the steps to configure and use this yourself.
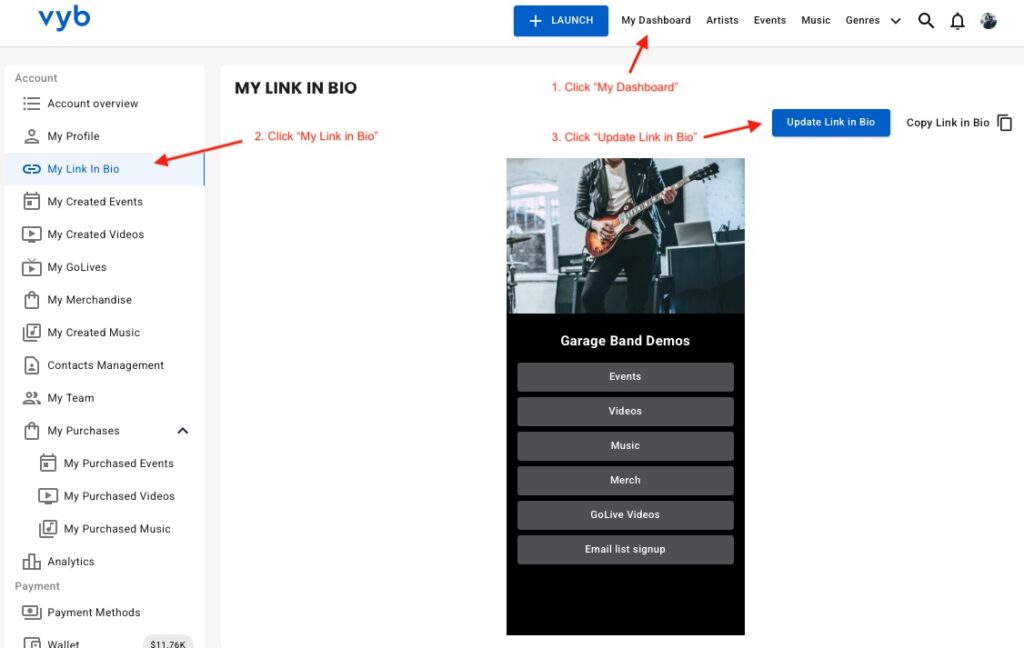
Step 1. Navigate to Link-in-Bio on your Dashboard.
First click on “My Dashboard” and then click on “My Link in Bio”
You will see your current Link In Bio.
From here, you can copy the link to it or update it.
Next click “Update Link in Bio” button to start configuring it
Step 2. Select Social and Music Platforms
Now simply select all the social and other content sites that you want. These will show up as icons underneath your name in your bio for easy access
Note that you can also add a generic button to your Link in Bio if you want something to be more prominent.
Step 3. Edit URLs for the selected links and Your Image
Next enter in the URLs for each of your social and music platforms.
Now re-order these links by selecting their icon and dragging it.
On the right hand side you can replace the picture that shows up on the top of your Link in Bio
Step 4. Edit Buttons
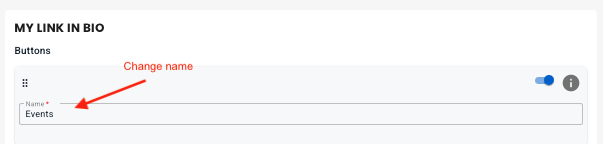
We have pre-populated your Link In Bio with links to everything in your vyb account. You don’t need to manually add those at all. You can change the name, but realize that each of these is preset to always go to that service. For example Merch button will always go to your vyb merch store.
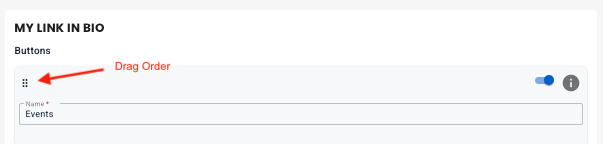
Now you can drag the buttons to re-order them.
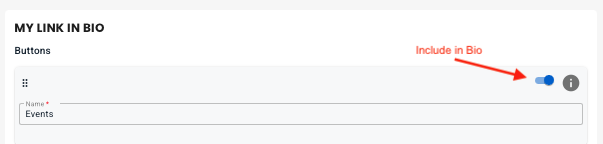
Next, you can also include or exclude any default button, but know that if you don’t have any content in that area we will auto-hide it anyway. For example, until you post some GoLives your GoLive button will be hidden.
Step 5. Add Custom Buttons
Next, if you want to add your own custom buttons, click “+ Add Button” to add your own button. Give it a name and a URL
Step 6. Style Your Link-in-Bio
Now choose one of the preset themes at the top for an initial starting point.
Next you can change the overall change background color, your name text color and font
Edit the button styles, picking color, font and transparent or solid.
Finally, when you are done, click “Save” and you are done editing.
Step 7. Add your Link-in-Bio to your Instagram and other Platforms
Finally, it’s time to go live and use your new Linke-in-Bio! Back on the main Link-In-Bio dashboard page, copy the link.
Paste this into your Instagram and all other services to give a one stop place for your fans to get to you.
The Fan List in vyb gives you useful information about fan interactions on the platform. You will see who has followed or subscribed, purchase history, so much more.
Navigate to My Dashboard, the from the left hand menu select “Marketing Hub/Fan List”
The first tab “Impact” shows you how each email you have sent has performed.
Select “List” to see the list of contacts.
Roles
Contacts can have one of several roles.
All-Access: Community member that pays a monthly fee
Member: Free Community Member
Supporter: Someone who has purchased something from you but not joined your community
Lead: Someone who has been added to your fan list but is not yet on the vyb platform.
Guest: someone you have invited as a Guest to one of your ticketed events
Purchase Total
For each person in your contact list you can see a lifetime total of what they have spent with you.
Purchase History
Click on the action menu next to a name and you can see the action menu. You can select purchase history and this will give you the complete list of purchases by this fan
In this example, the fan has a monthly subscription and has purchased several pieces of merch and event tickets.
Sending emails to your Contacts list
Send an email to any fan or group of fans in your list. Simply select one or more fans and then press the send mail icon.
You can use the filter button to get all subscribers, all followers, etc.
Edit the subject and content of your email. You can change fonts and add pictures and links.
Next, choose your audience. You can send to everyone in your list, your subscribers, contacts, etc. Note that if you select one or more contacts before launching the email editor, they will show up as the audience.
After that, pick a day to schedule your email to be sent.
It is so important to own your fan data. Don’t leave your fans locked away in social media or streaming services. Instead, use vyb’s free email tools to stay connected. You don’t need contact information for all your casual listeners, just the 9% of fans and 1% superfans that collectively make up 94% of your income. Read Why Super Fans Matter to learn more about the economics of super fans, and Why Every Artist Needs a Contact List to learn why you need to own your fan data.
To kiskstart your fan list, here are the steps to import any list you might already have:
Step 1: Navigate to Fan List in your Artist Dashboard
First, navigate to your Fan List under the Marketing Hub, and you’ll see all your current contacts, when they joined, and what they’ve spent.
Step 2. Download a template
You need a template to know how to organize your list and upload it.
Now simply click the upload list icon in the upper right and download either xlsx or csv template.
This template will have some example data, delete those out.
If you want to keep a complete doc around, you can also download your current list and just add to that.
Step 3. Edit downloaded file
You will see the headers in line one of the file, firstName, lastName, email, etc.
Leave those exactly, and paste into the file your list of contacts, keeping the columns identical.
Step 4. Edit your invite message
Go to Templates to access your Invite template. This message is sent to all your email list, inviting them to sign up to vyb and start following you.
If you have different mailing lists, you should choose a more personalized message.
Step 4. Upload contact file
Now click the import icon, then upload the contact file that you just edited.
In the example, I’ve uploaded contacts-4.xlsx
Now if you check the “Send invitation emails..” checkbox then vyb will auto-send all of your contacts the invite email that you’ve just edited.
Next, you can optionally add a tag to the contacts you’ve imported. The tag can be used in the future for sorting your fan list
Now just select import on the bottom right side.
After importing, you’ll see the new contacts. Note that they are initially listed as contacts; now you can message them to turn them into followers.
At any time, you can find those who are listed as “Leads” and email them to get them to join vyb.
Your Fan List is dynamic. Every time someone purchases or follows you, they get added automatically to your fan list. Even better, we have tools to boost your list.
First, in all your socials, use the list signup link either using our free Link In Bio or your preferred tool. See this article:
Every time you perform, you have the opportunity to build your fan contact list. In the olden days, there’d be a signup list for the band. name address, then whoa – we got emails! A hand-written list by the merch table that you hope to god Roddie the Roadie wasn’t too whacked on nicotine and extra-shot lattes to remember to grab after the gig. Then you have all these pages of illegible writing because they might have loved your music, but they also loved margaritas. Someone’s got to manually enter these all into a spreadsheet and hope you get them right.
At vyb we have several great features to help you build a fan list in the digital age, accurately and automatically.
Step 1: Navigate to Your Fan List in your Artist Dashboard
In your Marketing Hub, you’ll find your Fan List. You can search and sort this list.
Step 2. Click Get QR Code
Click on the GET QR Code button in the top left corner
Step 3. Edit Poster
We automatically generate a poster for you based on your profile, using your Artist name, and banner and profile pictures.
Click the edit button on either picture to delete them or swap them for another picture.
Step 4. Download Poster
Click the Download Poster button to download a pdf to your computer and then print at any size you want. Keep a copy at your merch table, tape a copy to the walls, put posters in the bathrooms. Work that hustle!
The QR code is unique to your band – below is what happens when fans scan – they get a mobile-friendly, easy signup form.
Fan signup form
Other creative ways to use your QR code
Besides downloading the autogenerated poster, you can also download your QR code as a transparent PNG file. Here are some different ways to use this QR code:
Make your own sign-up poster: Feeling creative? Make your own poster and add your QR code.
Flash the QR code onto a screen before/after your live set with a message for fans to sign up.
Print the QR code onto the bass drum graphic or dj wrap