Pre-Show Testing
In vyb, we provide tools to allow you to test all of your audio and video setups.
For deeper technical specifications, visit Video Streaming Technical Details
To perform testing, do the following:
Navigate to the event in your dashboard.
From the Action Menu select “Go To Event”
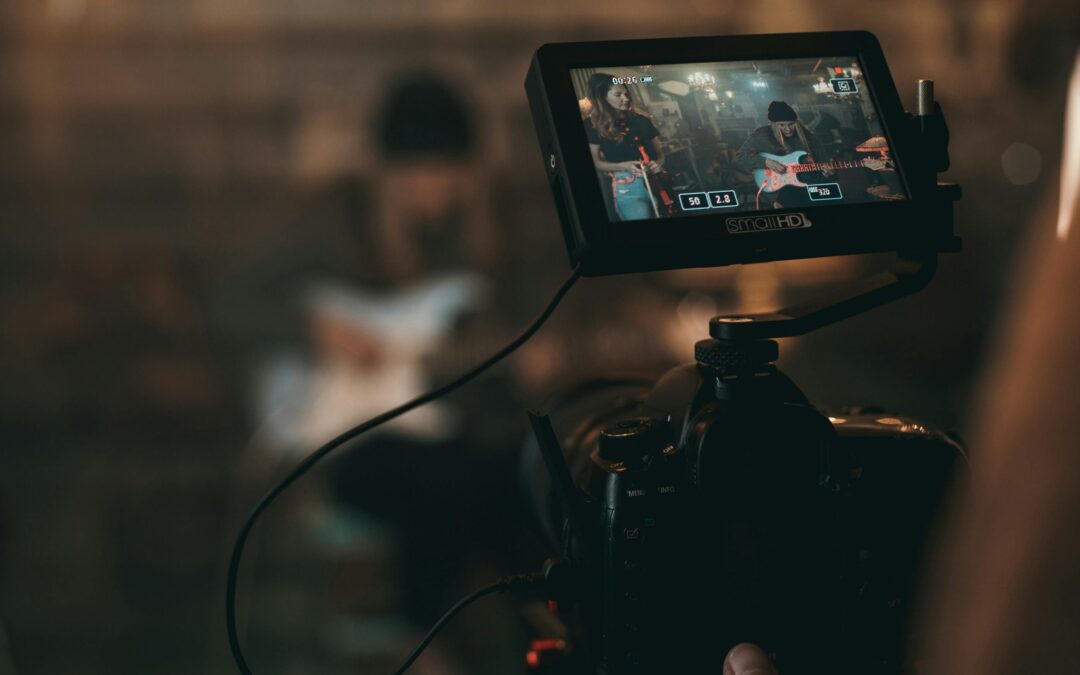
“Make Test Recording” allows you to record 30 seconds of audio and video, which will be sent to vyb’s servers and then available for playback.
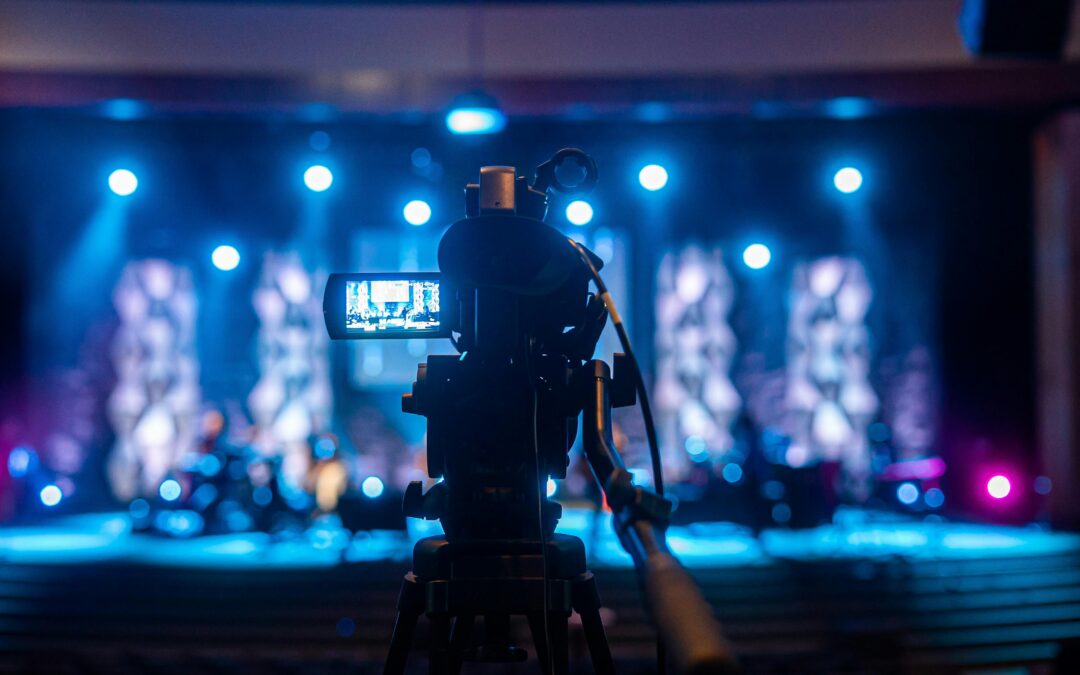
“Test Event” allows you to send a link to multiple people before the event, and they can listen/watch the current feed.
When you select Test Event, you will be offered the type of stream. You can use Webcam for your built in webcam or a direct USB connection from external connection like an ATEM MINI. For higher quality, select Streaming Software.
When you select Streaming Software, you will be given the Stream Settings.
Copy and paste those stream settings into OBS or any other streaming HW/SW.
For Security, every time you start streaming, you will need to get a new key. The server will not change.
After selecting your source, you’ll get a screen with the URL of the test event. This URL will change every time you start a test event.
Copy and send this URL to your phone or other people that are helping you test.
Example of viewing the event in test mode on a phone.
If instead of seeing the test event screen you see the general event screen, that means you are not logged in. Follow the steps below.
A few things to note about Test Event:
- Anyone helping to test the event must be have an account and be logged in to vyb. That account can be a fan account.
- If you are using an iPhone w/Safari, note that Safari by default is in private mode and simply clickng the URL will open a that is not logged in. To work around this, do the following steps:
- First, log in to vyb on Safari
- Message or email the url to the iPhone
- Copy the URL and paste it over the top of the URL for the tab where you are logged in.
- Now you will be at the event and viewing it to test
If you click the test event link and you show up at the event screen instead of in the test mode
Testing is available until 15 minutes before the events starts.
Running the Show
To run the show, 15 minutes before the show starts, the “Start Event” button will go active. Once pressed, you will get the same choice to pick the type of stream.
Just as in testing above, if you are using stream settings, copy and paste the new stream key as you start the stream.
You will start the stream in vyb and then use Start Streaming in OBS or other HW.
Stream Health Monitoring
While the show is running, above your Stream Chat is your Stream Health Monitor. You can expand that and see your current bitrate, frame rate, and key frame interval.
If you have connectivity issues, you may see the bitrate or frame rate drop. If it does not immediately improve, consider switching to a backup internet connection. See “Video Streaming Technical Details” for minimum and recommended streaming parameters.
Network/Upload bandwidth
Minimum recommended upload: 10 Mbps (roughly 1.6× your stream bitrate)
Comfortable upload: 15 Mbps or higher
Wired ethernet is strongly preferred — WiFi introduces jitter and packet loss that causes dropped frames even when your speed test looks fine
Test your upload speed at the venue or location before going live, not just at home
5G/Cellular Backup
Most professional streamers run a cellular connection as a backup — or primary — when venue WiFi is unreliable or wired ethernet isn’t available
5G (mid-band or mmWave) can deliver 50–300 Mbps upload in good conditions, well above what vyb requires
A dedicated mobile hotspot is preferable to tethering from your phone — it keeps your phone free and maintains a more stable connection
Bonded streaming: pros often use hardware encoders (Teradek, LiveU, YoloBox) or apps (Speedify, Calix) that bond multiple connections — WiFi + 5G simultaneously — for maximum reliability. This is worth considering for high-stakes shows.
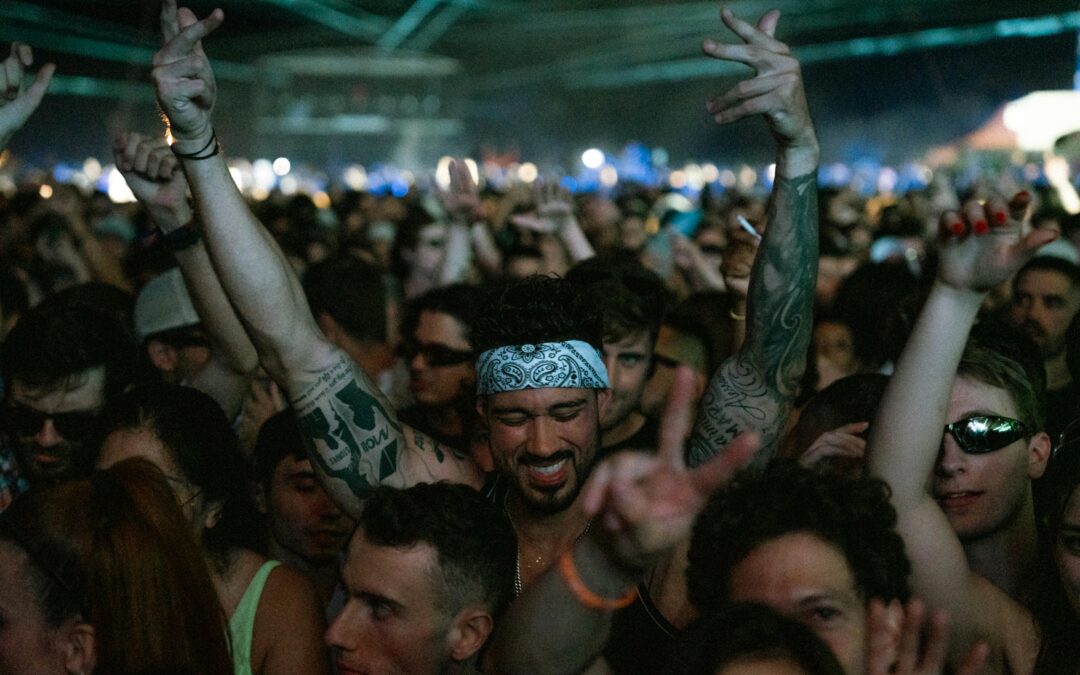
Cellular signal varies dramatically by venue. An outdoor festival with 10,000 people will saturate nearby towers.
Check signal before the show, not during.If you’re relying on 5G, use a hotspot with an external antenna port and a window-mounted antenna where possible — especially in concrete venues
Video
Protocol: RTMPS (secure/recommended), RTMP
Codec: H.264 (x264), Baseline or Main profile. High profile supported but not required.
Keyframe interval: 2 seconds — hard requirement. OBS calls this “Keyframe Interval = 2.”
B-frames: Disabled — do not enable
Rate control: CBR (Constant Bitrate) required — VBR will cause buffering and dropped frames
Max bitrate: 6,000 Kbps for partners
Recommended bitrate by resolution:
- 1080p60 → 4,500–6,000 Kbps
- 1080p30 → 3,500–5,000 Kbps
- 720p60 → 3,500–5,000 Kbps
- 720p30 → 2,500–4,000 Kbps
Frame rate: 30 or 60 fps.
Resolution: Max 1920×1080.
Pixel format: YUV 4:2:0
Audio
Channels: Stereo recommended. Mono accepted.
Codec: AAC-LC
Sample rate: 44.1 kHz or 48 kHz
Bitrate: 128 Kbps stereo (minimum); 160–192 Kbps recommended for music
Software / Encoder Settings
OBS Studio (most common, free, recommended)
- Encoder: x264 (software) or hardware encoder if available (NVENC for NVIDIA, AMF for AMD, VideoToolbox for Apple Silicon)
- Rate control: CBR
- Bitrate: match your target from the spec above (e.g. 6,000 Kbps for 1080p60)
- Keyframe interval: 2 seconds — set explicitly, do not leave on “auto”
- CPU usage preset (x264 only): veryfast or superfast — slower presets look better but will drop frames if your CPU can’t keep up
- Profile: Main or Baseline
- B-frames: 0
- Audio encoder: AAC, 192 Kbps, 48 kHz, stereo
Hardware encoders (Blackmagic/NVENC / AMF / VideoToolbox)
- Prefer hardware encoding if your GPU supports it — offloads the CPU, more stable under load
- Set “Max Quality” or “Quality” preset in NVENC; avoid “Performance” mode
- AMD AMF: Solid alternative on AMD cards; same CBR and keyframe rules apply
- Apple VideoToolbox: Strong choice on Apple Silicon (M1/M2/M3); handles long streams well without thermal issues
- Blackmagic Design: ATEM Mini Pro and ATEM Mini Extreme are the go-to hardware switchers for professional music streaming — handle multi-camera switching, built-in encoding, and direct RTMP output without a separate computer. The ATEM Mini Pro ISO also records all inputs locally as a safety net. Pairs well with Blackmagic cameras but works with any HDMI source.
- Same CBR, keyframe interval = 2, and B-frames = 0 rules apply regardless of encoder or switcher
Streamlabs
- Built on OBS under the hood — same settings apply
- Settings are in the same locations; output and video tabs are identical in structure
- Slightly higher resource usage than OBS Studio
XSplit
- Supported but less common in music/live performance contexts
- Same CBR and keyframe rules apply; found under Stream Settings → Output
Mobile streaming (iPhone / Android)
- Apps: Larix Broadcaster (free, pro-grade), Streamlabs Mobile, Prism Live
- Larix is the strongest choice for manual control — lets you set exact bitrate, keyframe interval, and CBR
- On mobile, cap bitrate at 4,000 Kbps for 1080p30 — mobile encoders are less efficient than desktop
- Use 720p60 or 1080p30 rather than 1080p60 on mobile — thermal throttling on long streams will degrade quality
- Lock your phone orientation before going live
- Airplane mode + WiFi or hotspot only — an incoming call will kill your stream on most setups
General tips across all software
- Do a full test stream before any show — stream to a private/unlisted GoLive and watch the playback
- Monitor your encoder’s dropped frames counter during the stream; anything above 1–2% means something is wrong
- Close all background applications — browsers, cloud sync, video calls — before going live
- If you’re on a laptop, plug into power; encoding on battery triggers thermal throttling

You’ve got the gig booked, now let’s tell your fans. T
At vyb, we make it easy for you to send out an email blast to your fans. Below are the steps to make that happen.
Step 1. After Publishing Your Release, Launch a Campaign
Anytime you make changes to an event, you will get a popup that allows you to create a campaign.
Select ‘Create Campaign’
Alternatively, you can go to your dashboard and under the action menu select “+ Create Campaign”
Step 2. Edit Email Content
Now edit the campaign name, making it something you will remember. Only you will see this name
Next, edit the subject and message. Write something memorable and personal. The best announcements don’t just say I have something new, the tell the story of the music. Don’t be afraid to open up!
Now you can also change the banner image for your email.
Then you can scroll down and see a preview of the email, including the automatic call to action button we insert.
Step 3. Set Audience and Timing
The default audience is ‘All’, meaning everyone in your list. If you want to run multiple customized campaigns, just repeat this process. For example, you may want to send a special message to All-Access if they have an exclusive for this release.
Finally, set the scheduled date for your campaign email to begin and press SEND! You are done
To monitor your campaign, open “Campaigns” under the Marketing Hub.
There you can see how many emails were sent how many delivered, etc.
Tips for your Email Campaign
Your fans care about you. They want you to win. Give them a reason to root for you. Don’t just say you’re on the road and you think it’s cool. Give them some behind-the-scenes information. Tell them about the show, about the artists on tour with, tell them why they need to see this show.
The event campaigns give you a really easy way to tell all your email list about your next show. To learn more about building up your list, read these articles:

For your events, you can offer your fans a discount code reward. This is perfect when you don’t want to give a free guest pass, but you still want to do something for someone. This is also useful as an extra perk you can send out to your followers, typically only subscribers get discounts.
Below, we show the steps to create a discount code:
Step 1. Navigate to Fan Rewards in your Dashboard
Go to the Marketing Hub under your Artist Dashboard. Inside the Marketing Hub, click Fan Rewards
Step 2. Create Reward
Click “+ Create Reward”, launching the popup
Set the reward code to something easy like “Show10” for 10% off
The discount amount can be in fixed dollars or as a percentage. If you have multiple tiers, the percentage is a little more straightforward.
Click the resource name to select the event that you are attaching this code
If you would like this to run for a limited time, then set an end date
Step 3. Monitor Reward Usage
You can monitor your discount code in the Fan Rewards dashboard.
This includes usage and overall net sales using the discount code
Here are some ideas for using the fan reward:
- Send an email blast to all your followers, offering a discount
- Post to socials a limited-time discount code when your event goes live
- When someone buys some merch from you, send them a discount code to your next show.
When it is time for your livestream, you can set up a separate production sub-account with limited access only to the streaming for your event. This sub-account is completely optional. If you are controlling all your livestreams yourself, you can simply use your artist account.
But if you have a larger production, then with a sub-account, you can simply give access only to the streaming part of your event, all the rest of your account is kept separate.
Here are the steps to setup and manage production sub-accounts
Step 1. Navigate to Sub-Accounts in Your Profile
Click ‘My Profile’
Select ‘My Team’
Click ‘My Sub Accounts’
Step 2. Create a Production Sub-Account
Click ‘Create Sub-Account’
In the pop-up, give your sub-account a user name, and select the Live Stream role
Click ‘Create’ to make the sub-account
We will auto-generate the password.
Step 3. Copy User Name and Password
You can now copy your user name and password for the sub-account.
From the action menu you can generate a new password or delete this sub-account
Step 4. Log in to vproduction.vyb.co
We have a dedicated site, vproduction.vyb.co for your production team. Simply login with the sub-account username and password
Step 5. You are ready to go!
Your production team will see all your upcoming events. They can simply select the event and setup and run all the streaming.
Selecting an upcoming show will allow you to set up and test your livestreaming. You won’t be able to start the show, but you can test.
‘Make Test Recording’ streams out 30 seconds of audio and video to the vyb servers. You can watch and listen to the playback to ensure you have the correct quality.
‘Test Event’ allows you to send a link out to multiple people who can watch/listen to the setup. Test Event is available up to 15 minutes before the event.
You can re-use the sub-account name and password for different events, or to be more secure, reset the password for each event.
Further Technical Information can be found at Video Streaming Technical Details
When it is time for your in-person app, you can use the web or mobile version of the vyb ticket scanning app.
In vyb we have the ability to set multiple scanning users, and for each scanner, they can change their scanner role on the fly. For example, you will be default always have a ‘Door’ role for scanning people at the entrance. Additionally, we auto-populate a role for each in-person ticket tier. For example, if you have GA and VIP seating, you will find those roles.
Note: the native mobile scanning app is now in beta, to get access to the beta contact help@vyb.co
Step 1. Set up a scanner user as a sub account
Navigate to sub-accounts by clicking My Dashboard, My Team, My Sub-Accounts
Click Create Sub-Account
Give your subaccount a username and select the Ticketing role.
We will auto-generate passwords for all subaccounts.
For each of your sub-accounts, you can now easily copy the username and password and send to your team members.
Under the Action menu you can delete a role or reset the password
Step 2. Navigate to vybtix.com
Navigate on your mobile over to vybtix.com. When it is released, you’ll be able to download the vybtix mobile app from the app store.
For the web app, click on “Use Web Version”
Step 3. Log In
Log in to the account using the ticket scanning account created above.
Step 4 Select Event
Note that if you don’t have an upcoming event, you won’t see any events to select
You also won’t be able to scan until the day of the event
Step 5. Select Tier to Scan
You can choose which tier you need to scan. By default, there is a main door scan location.
Note we only allow a QR code to be scanned once at the door and again at a specific location. For example, if you have a VIP section, the fan will be scanned once at the door by a person with the ‘Main Door’ role and then a second time by a person at the ‘VIP Seating’ entrance. You’ll want to give the fan a stamp or wristband in they’ll need to be able to leave and re-enter the VIP area, because we will not allow a duplicate scan. This way we prevent duplicate use of a QR code
Beta Scanning App
To get access to the beta of the ticket scanning app, please contact help@vyb.co


